Skin Biopsy Procedure USA 2026: Costs, Types, Insurance Coverage & FAQs
Skin Biopsy Procedure USA 2026: Costs, Types, Insurance Coverage & FAQs
Introduction
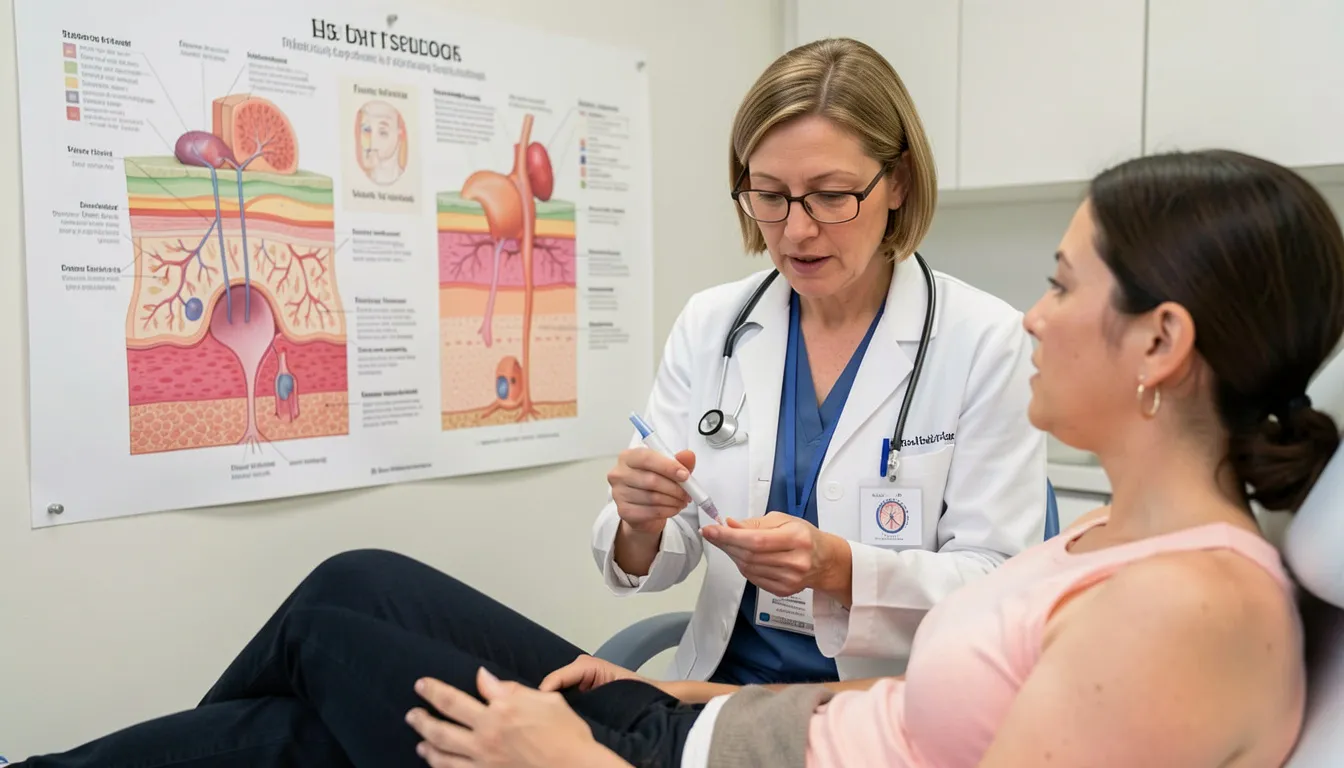
A skin biopsy procedure is a medical test in which a small sample of skin tissue is removed for laboratory analysis. This procedure is crucial for diagnosing various skin conditions, including infections, inflammatory disorders, and most importantly, skin cancers. In the USA 2026, advances in dermatology and pathology have made skin biopsies more precise, minimally invasive, and safe.
Whether your doctor suspects melanoma, basal cell carcinoma, or other dermatological issues,
understanding the types, process, costs, insurance coverage, and post-procedure care is essential for patients.
Types of Skin Biopsy Procedure
A skin biopsy procedure is chosen based on factors like the size, depth, and location of the skin lesion, as well as the suspected diagnosis. Each type of skin biopsy procedure has its unique approach, benefits, and limitations. Understanding these differences can help patients and caregivers prepare better and reduce anxiety about the skin biopsy procedure.
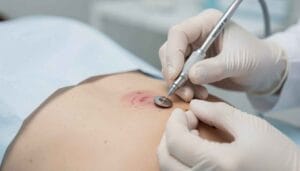
1. Shave Biopsy

A shave biopsy procedure is one of the simplest and quickest types of skin biopsy procedure. It involves removing only the top layers of skin — the epidermis and sometimes a portion of the dermis — using a small, sharp blade.
Key Details of the Skin Biopsy Procedure:
- Purpose: Primarily used for superficial skin lesions, such as warts, moles, skin tags, or benign growths. Particularly effective for raised or protruding lesions.
- Procedure: After applying local anesthesia to numb the area, the doctor carefully shaves off the lesion as part of the skin biopsy procedure. The sample is then sent for histopathological analysis.
- Advantages:
- Quick and minimally invasive
- Usually does not require stitches
- Very little downtime; most people can get back to their regular routines right once.
- Limitations:
- Cannot remove deep lesions that involve the dermis or subcutaneous tissue
- Slight risk of scarring or pigment changes, especially on darker skin
- Recovery: Healing typically occurs within 7–10 days. Minor redness or a scab at the biopsy site is normal.
Example Use Case: A dermatologist may recommend a shave biopsy procedure for a small, raised mole that has changed color or size to rule out superficial melanoma or other abnormal growths.
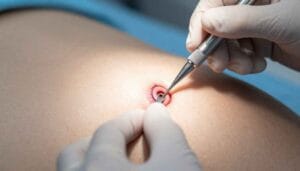
2. Punch Biopsy
A punch biopsy procedure removes a circular core of skin, extending deeper than a shave biopsy. This skin biopsy procedure captures all layers of the skin, including the epidermis, dermis, and sometimes a portion of subcutaneous tissue.
Key Details of the Skin Biopsy Procedure:
- Purpose: Often used to diagnose inflammatory or autoimmune skin conditions, such as eczema, psoriasis, lichen planus, or rashes of unknown origin. Also used for suspected skin cancers in small lesions.
- Procedure:
- Local anesthesia is applied to numb the area.
- A circular punch tool, typically 2–6 mm in diameter, removes a full-thickness skin core as part of the skin biopsy procedure.
- The sample is preserved and sent for pathology.
- The wound may be closed with stitches, depending on size.
- Advantages:
- Provides a full-thickness skin sample for more accurate diagnosis
- Minimally invasive compared to excisional biopsy
- Limitations:
- Small scar may remain
- Slight discomfort post-procedure
- Recovery: Typically 10–14 days; stitches are removed after 7–10 days.
Example Use Case: A patient with a persistent, unexplained rash may undergo a punch biopsy procedure to help the dermatologist determine the exact cause and plan treatment.
3. Excisional Biopsy
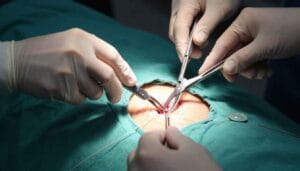
An excisional biopsy procedure is the most comprehensive skin biopsy procedure, involving the removal of the entire lesion along with a margin of healthy surrounding tissue. This is most commonly used when malignancy is suspected.
Key Details of the Skin Biopsy Procedure:
- Purpose: Complete removal of suspicious skin lesions for both diagnostic and therapeutic reasons.
- Procedure:
- Local or general anesthesia is applied.
- The lesion and surrounding tissue are excised in an elliptical shape to facilitate suturing.
- The wound is closed with stitches.
- The tissue is sent for pathological examination.
- Advantages:
- Entire lesion removed, reducing risk of leaving malignant cells behind
- Can serve diagnostic and therapeutic purposes simultaneously
- Limitations:
- More invasive than shave or punch biopsies
- Longer healing time; scar may be more noticeable
- Recovery: Healing can take 2–4 weeks; sutures removed in 10–14 days.
Example Use Case: A patient with a suspicious mole larger than 6 mm may undergo an excisional biopsy procedure to ensure full removal and accurate diagnosis.
4. Incisional Biopsy
An incisional biopsy procedure removes only a portion of a larger lesion, especially when full excision is impractical or may compromise cosmetic or functional outcomes. This type of skin biopsy procedure is carefully planned by the dermatologist.
Key Details of the Skin Biopsy Procedure:
- Purpose: Recommended for large tumors or lesions on sensitive areas such as the face, scalp, or near joints.
- Procedure:
- Local anesthesia is applied.
- A representative portion of the lesion is removed as part of the skin biopsy procedure.
- Remaining lesion may be treated later depending on diagnosis.
- Advantages:
- Minimally invasive for large lesions
- Reduces risk of scarring or functional impairment
- Limitations:
- Does not completely eradicate the lesion; more care could be required.
- Risk of sampling error if non-representative tissue is removed
- Recovery: Healing is similar to punch biopsies, generally 1–2 weeks.
Example Use Case: A large, irregular skin tumor on the cheek may require an incisional biopsy procedure to confirm malignancy before planning surgery.
Additional Considerations
- Choosing the Type: Dermatologists consider lesion size, depth, suspected diagnosis, location, cosmetic concerns, and patient health before selecting a skin biopsy procedure.
- Combination Procedures: Sometimes shave or punch biopsies are followed by excisional procedures if results indicate malignancy.
- Pediatric and Elderly Patients: Special care is taken in sensitive populations to minimize pain, anxiety, and scarring during the skin biopsy procedure.
Preparation for Skin Biopsy Procedure
Proper preparation is crucial for a successful skin biopsy procedure. Adequate preparation not only ensures accurate results but also minimizes risks such as infection, bleeding, or complications during healing. Depending on the type of biopsy (shave, punch, excisional, or incisional), preparation steps may vary slightly.
1. Medical History Review
Before the procedure, your doctor or dermatologist will conduct a thorough review of your medical history. This helps identify any risk factors that could affect the biopsy or healing process. Key points include:
- Allergies: Any known allergies to local anesthetics, antiseptics, or medications. Allergic reactions can complicate the procedure.
- Medications: Blood thinners (like aspirin, warfarin, or certain supplements) can increase the risk of bleeding. Your doctor may advise temporarily adjusting doses.
- Medical Conditions: Diabetes, immune disorders, or skin conditions that may affect healing. For example, patients with poorly controlled diabetes may have delayed wound healing.
- Previous Skin Surgeries: Knowledge of prior biopsies or scarring helps plan the current procedure and minimize cosmetic issues.
2. Skin Cleaning
A clean biopsy site reduces the risk of infection and ensures the tissue sample is not contaminated. Preparation includes:
- Washing the area gently with mild soap and water before arriving at the clinic.
- The dermatologist will apply an antiseptic solution (commonly iodine or chlorhexidine) to sterilize the site immediately before the procedure.
- Removing any dirt, oils, or cosmetics ensures that the pathologist receives a clean tissue sample for accurate diagnosis.
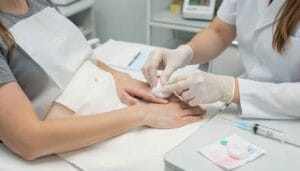
3. Local Anesthesia
Most skin biopsies use local anesthesia to numb the biopsy site. This is essential to minimize pain and discomfort during the procedure.
- Application: An injection or topical anesthetic is applied directly to the biopsy area.
- Effectiveness: Numbs the epidermis and dermis without affecting consciousness.
- Patient Comfort: Some patients may feel a brief sting during injection, but the procedure itself is typically painless.
- Considerations: For larger lesions or excisional biopsies, sedation or general anesthesia may occasionally be used, especially in anxious patients or children.
4. Patient Instructions
Following specific instructions before a skin biopsy ensures the procedure goes smoothly and reduces complications:
- Avoid Creams, Lotions, or Makeup: Residues can interfere with antiseptic cleaning and biopsy accuracy.
- Do Not Shave the Area Yourself: The clinic may need to shave the area in a sterile manner to prevent infection.
- Clothing: Wear loose, comfortable clothing that allows easy access to the biopsy site.
- Arrive Prepared: Bring a list of current medications and any medical documents if needed.
- Ask Questions: Patients are encouraged to discuss concerns, expected healing time, and any post-procedure care instructions beforehand.
Additional Preparation Tips
- Arrange Transportation if Needed: If sedation or larger procedures are planned, someone may need to drive you home.
- Follow Pre-Procedure Guidelines: Some dermatology clinics may advise avoiding certain medications or supplements (like NSAIDs) that can increase bleeding risk.
- Mental Preparation: Anxiety can be decreased by knowing what to anticipate. Clinics often provide brochures or videos explaining the biopsy process.
The Procedure Steps for Skin Biopsy
A skin biopsy procedure is generally safe, quick, and minimally invasive. While the exact steps vary depending on the type of biopsy (shave, punch, excisional, or incisional), most procedures follow a similar workflow to ensure accurate sampling and patient safety. Understanding these steps can help reduce anxiety and prepare patients for what to expect.
1. Marking the Area
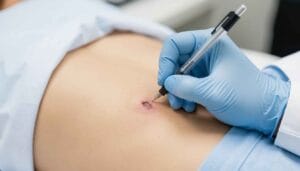
Before removing any tissue, the dermatologist carefully marks the lesion or area of concern.
- Purpose:
- Ensures the correct area is sampled.
- Helps guide the incision for optimal tissue removal and cosmetic outcome.
- Technique:
- The lesion is delineated with a skin-safe pen or surgical marker.
- For larger or irregular lesions, multiple marks may be made to indicate biopsy orientation.
- Patient Tip:
- Don’t wash off the marker until after the procedure; it guides precise removal.
2. Anesthesia Application

Next, local anesthesia is applied to numb the biopsy site.
- Purpose: Minimizes pain and discomfort during tissue removal.
- Technique:
- The doctor injects a small amount of anesthetic under the skin near the biopsy site.
- For sensitive areas (like the face), careful slow injection reduces discomfort.
- Patient Experience:
- A brief sting may be felt during injection.
- Once numb, the procedure is generally painless.
3. Tissue Removal
The main step is removing the skin sample, which depends on the biopsy type:
- Shave Biopsy: The doctor uses a small blade to shave off the top layer of skin.
- Punch Biopsy: A circular punch tool removes a deeper, cylindrical core of skin.
- Excisional Biopsy: The entire lesion and surrounding tissue are surgically removed.
- Incisional Biopsy: Only a portion of a larger lesion is taken for analysis.
Patient Tip:
- The procedure may feel pressure or slight tugging, but numbness from anesthesia prevents pain.
- Duration varies from a few minutes for shave/punch biopsies to 15–30 minutes for excisional procedures.
4. Hemostasis (Controlling Bleeding)
After tissue removal, the doctor ensures bleeding is controlled:
- Techniques:
- Direct pressure with sterile gauze.
- Sutures (stitches) for punch, excisional, or incisional biopsies.
- Sometimes cauterization for very small superficial bleeding.
- Patient Tip:
- Minor bleeding after leaving the clinic is normal.
- Apply gentle pressure and follow post-care instructions to prevent excessive bleeding.
5. Dressing the Site
The biopsy site is then covered with a sterile dressing to protect against infection and promote healing.
- Types of Dressings:
- Adhesive bandages for small wounds.
- Sterile gauze and tape for larger or sutured sites.
- Care Instructions:
- Keep the dressing dry and clean.
- Change dressing as instructed by the dermatologist.
- Avoid touching the biopsy site unnecessarily.
6. Sample Handling
Finally, the removed tissue is preserved and sent for pathology:
- Preservation: The sample is placed in a fixative solution, usually formalin, to maintain tissue structure.
- Pathology Analysis:
- The tissue is examined under a microscope for abnormalities, infections, or cancerous cells.
- Results typically take 3–7 days, though some complex tests may take longer.
- Patient Tip:
- Ask your dermatologist about expected turnaround time for results.
- Understand that follow-up may involve further treatment depending on the diagnosis.
Additional Tips for Patients During the Procedure
- Relaxation Techniques: Deep breathing can reduce anxiety during injections or tissue removal.
- Communication: Inform the doctor immediately if you feel pain or discomfort despite anesthesia.
- Post-Procedure Care Instructions: Ask for clear instructions regarding dressing changes, bathing, and activity restrictions.
Recovery and Aftercare After a Skin Biopsy Procedure
Proper recovery and aftercare following a skin biopsy procedure are essential for healing, preventing infection, and ensuring that the biopsy site looks as normal as possible after the procedure. Recovery depends on the type and size of the skin biopsy procedure, the location on the body, and your overall health.
Healing Time
- Small Biopsies:
- Shave or punch skin biopsy procedures typically heal in 1–2 weeks.
- Minor redness, scabbing, or mild tenderness is normal during this period.
- Larger Excisional or Incisional Biopsies:
- Healing may take 2–4 weeks or more, depending on the depth and location of the wound.
- Areas like the scalp or joints may take longer to heal due to movement or tension on the skin.
Tip: Be patient and avoid rushing healing. For cosmetic areas (face or neck), follow-up with your dermatologist after a skin biopsy procedure may be recommended to minimize scarring.
Care Instructions
Proper care after a skin biopsy procedure ensures a smooth recovery and reduces complications:
- Keep the Site Clean:
- Wash hands before touching the biopsy area.
- Gently clean with mild soap and water if recommended by your dermatologist.
- Avoid Scratching or Picking:
- Scratching can introduce bacteria and increase the risk of scarring after the skin biopsy procedure.
- Follow Prescribed Medications:
- Apply antibiotic ointments if prescribed.
- Pain relievers, like acetaminophen, may be used for mild discomfort.
- Limit Sun Exposure:
- Protect healing skin from direct sunlight to prevent pigmentation changes.
- Apply sunscreen once the wound has closed, if advised by your dermatologist.
- Activity Restrictions:
- Avoid strenuous activities that may strain or reopen the wound.
- Swimming in pools or hot tubs should be avoided until the skin biopsy procedure site is fully healed.
Suture Removal
- Punch or Excisional Biopsies:
- If stitches were used, they are typically removed 7–14 days after the skin biopsy procedure, depending on location and wound size.
- Shave Biopsies:
- Usually do not require stitches and heal naturally.
Tip: Always follow your dermatologist’s instructions regarding suture removal; premature removal can increase bleeding or scarring after a skin biopsy procedure.
Watch for Infection
Even though infection is rare, monitoring the biopsy site after a skin biopsy procedure is important:
Warning Signs:
- Increasing redness, swelling, or warmth around the wound
- Pus or foul-smelling discharge
- Excessive pain that worsens over time
- Fever in rare cases
Action: Contact your dermatologist immediately if any of these symptoms occur. Early treatment with antibiotics or wound care prevents complications after a skin biopsy procedure.
Additional Recovery Tips
- Comfort Measures:
- Elevate limbs if the biopsy site is on an arm or leg to reduce swelling.
- Use ice packs for the first 24 hours to reduce swelling, if advised.
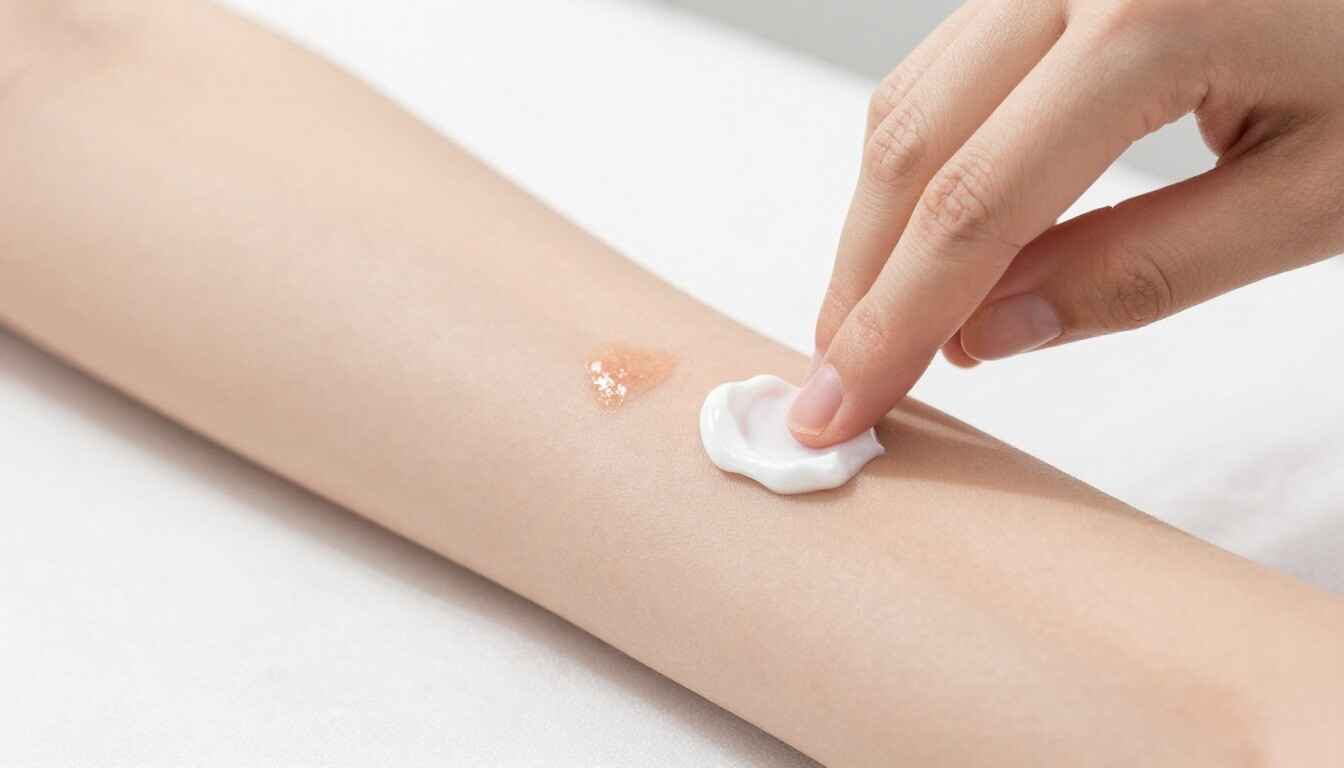
- Scar Minimization:
- Once fully healed, gentle massage with moisturizer or silicone gel may reduce scarring from the skin biopsy procedure.
- Follow-Up Visits:
- Attend any scheduled appointments to review pathology results and discuss further treatment if needed after the skin biopsy procedure.
Costs of Skin Biopsy in USA 2026
The cost of a skin biopsy procedure in the USA in 2026 can vary widely depending on the type of biopsy, the location of the clinic or hospital, and the complexity of the procedure. Understanding the costs beforehand helps patients plan financially and avoid unexpected bills.
Average Costs by Biopsy Type
| Biopsy Type | Cost Range (USD) | Details |
| Shave Biopsy | $150 – $400 | Quick procedure; minimal anesthesia required; often no stitches. |
| Punch Biopsy | $200 – $600 | Full-thickness skin sample; may require one or two stitches. |
| Excisional Biopsy | $400 – $1,200 | Entire lesion removal; may require sutures and more time; larger lesions cost more. |
| Incisional Biopsy | $300 – $900 | Partial lesion removal for large tumors; depends on size and complexity. |
Additional Costs to Consider:
- Pathology Lab Fees: Typically $50–$300 depending on the analysis required.
- Anesthesia Fees: Small local anesthesia usually included; sedation or general anesthesia costs extra.
- Facility Charges: Hospitals or surgical centers may charge higher than outpatient dermatology clinics.
- Geographical Variation: Urban areas like New York, Los Angeles, or Chicago tend to have higher costs than smaller cities or rural areas.
Factors Affecting Costs
- Type and Size of Lesion: Larger or deeper lesions require more time, sutures, and resources.
- Biopsy Type: Excisional biopsies are more complex and costlier than shave or punch biopsies.
- Facility Type: Hospitals or specialized surgical centers usually charge more than dermatology offices.
- Geographic Location: Costs in metropolitan cities are generally higher due to higher operating expenses.
- Pathology Complexity: Specialized staining, immunohistochemistry, or genetic testing can increase pathology fees.
Insurance Coverage and Out-of-Pocket Costs
Most insurance plans in the USA cover skin biopsy procedures if they are medically necessary.
- In-Network vs. Out-of-Network: Choosing an in-network dermatologist or hospital can reduce your out-of-pocket costs.
- Copays and Deductibles: Patients may still need to pay depending on their insurance plan.
- Biopsies done for diagnostic purposes are usually covered by Medicare and Medicaid, though state-by-state coverage may differ.
- Uninsured Patients: May need to pay the full cost; some clinics offer payment plans or discounted rates.
Practical Tips to Manage Costs
- Ask for Estimates: Before the procedure, request a detailed cost estimate, including pathology and anesthesia fees.
- Check Insurance Coverage: Verify whether the procedure is covered and if pre-authorization is required.
- Compare Facilities: Costs may vary between dermatology clinics and hospitals; sometimes outpatient clinics offer lower fees for the same procedure.
- Consider Payment Plans: Many clinics provide installment options or financial assistance for uninsured patients.
Insurance Coverage for Skin Biopsy Procedure in USA 2026
Most health insurance plans in the USA cover skin biopsy procedures when they are deemed medically necessary. Understanding how insurance works can help patients reduce out-of-pocket expenses and plan for potential costs.
1. Medically Necessary
- Definition: Insurance companies require a valid medical reason for performing a skin biopsy.
- Examples:
- Suspicion of skin cancer (melanoma, basal cell carcinoma, or squamous cell carcinoma)
- Unexplained rashes or chronic inflammatory skin conditions
- Diagnostic confirmation of autoimmune or infectious skin disorders
- Tip: Your dermatologist usually provides documentation to the insurance provider to justify medical necessity.
2. In-Network vs. Out-of-Network
- In-Network Providers: Choosing dermatologists or facilities contracted with your insurance plan typically reduces costs.
- Out-of-Network Providers: May result in higher out-of-pocket expenses or denial of coverage.
- Tip: Always confirm the dermatologist or clinic is in-network before scheduling the biopsy.
3. Co-Pays & Deductibles
- Even with insurance, patients may be responsible for copayments or deductibles depending on their plan.
- Example: If your plan has a $500 deductible and a $50 copay for specialist visits, you may pay part of the biopsy cost until the deductible is met.
- Tip: Ask the billing department for an estimated patient responsibility before the procedure.
4. Medicare & Medicaid
- Medicare: Typically covers skin biopsies if medically necessary; may require a referral from a primary care provider or dermatologist.
- Medicaid: Coverage varies by state but generally includes diagnostic skin biopsies.
- Tip: Always check your specific state Medicaid plan for coverage details and any pre-authorization requirements.
5. Practical Insurance Tips
- Pre-Authorization: Some plans require approval before scheduling the biopsy.
- Documentation: Keep all pathology and procedure reports for insurance claims.
- Payment Plans: If your plan has high out-of-pocket costs, many clinics offer installment plans or financial assistance.
Risks and Complications of Skin Biopsy
Although skin biopsy procedures are generally safe and low-risk, like any medical procedure, they can have complications. Being aware of potential risks helps patients monitor for problems and seek timely care.
1. Infection at the Biopsy Site
- Signs: Redness, warmth, swelling, pus, or foul odor.
- Prevention: Keeping the site clean, following dressing instructions, and applying prescribed antibiotic ointments if recommended.
2. Bleeding or Hematoma Formation
- Cause: Minor blood vessel injury during tissue removal.
- Management: Pressure application and proper wound care usually stop bleeding. Severe or persistent bleeding should be evaluated by a doctor.
3. Scarring
- Minor Scars: Most small shave or punch biopsies leave minimal marks.
- Noticeable Scars: Larger excisional or incisional biopsies may result in more visible scars, especially on the face, neck, or areas of high tension.
- Prevention: Proper suturing, post-procedure care, and avoiding sun exposure reduce scar visibility.
4. Allergic Reactions
- Rare Cases: Some patients may react to local anesthetics or antiseptics.
- Signs: Rash, itching, swelling, or more severe reactions.
- Tip: Inform your dermatologist about any known allergies before the procedure.
5. Delayed Wound Healing
- High-Risk Patients: Individuals with diabetes, autoimmune disorders, or poor circulation may experience slower healing.
- Management: Close monitoring, proper wound care, and sometimes topical or systemic medications to aid healing.
Minimizing Risks
- Follow all post-procedure instructions
- Keep the biopsy site clean and protected.
- Attend follow-up appointments to check healing progress.
- Contact your dermatologist immediately if you notice unusual symptoms.
Frequently Asked Questions (FAQs) About Skin Biopsy Procedure
Q1. Is a skin biopsy painful?
- Answer: Most skin biopsy procedures are performed under local anesthesia, which numbs the area and makes the procedure virtually painless.
- You may feel a brief sting when the anesthesia is injected, but the biopsy itself is generally comfortable.
- For a few days following the procedure, the biopsy site may feel slightly painful, uncomfortable, or sore.
Tip: Applying ice packs for the first 24 hours and taking over-the-counter pain relievers (like acetaminophen) can help ease any post-procedure discomfort.
Q2. What is the turnaround time for results?
- Routine pathology results usually take 3–7 days, but some complex analyses (such as immunohistochemistry or genetic testing) may take longer, up to 2–3 weeks.
- Your dermatologist will inform you about the expected timeline based on the type of biopsy and tests ordered.
Tip: Always follow up with your dermatologist to discuss results and any next steps.
Q3. Can a biopsy spread skin cancer?
- When performed properly, a skin biopsy is safe and essential for accurate diagnosis.
- Cancer cells are contained within the tissue sample and sent to the lab for analysis.
- Delaying a biopsy can be riskier than performing it, especially if a lesion is suspected to be malignant.
Tip: Trust your dermatologist’s technique and sterile procedure to ensure safety.
Q4. Will I need stitches?
- Shave biopsies: Usually do not require stitches; the wound heals naturally.
- Punch biopsies: May require one or two stitches depending on size and depth.
- Excisional or incisional biopsies: Almost always require sutures, especially for larger lesions or areas under tension (like joints).
Tip: Follow post-procedure care instructions for stitches, and attend follow-up appointments for suture removal to ensure proper healing.
Q5. Can I return to work immediately?
- Most patients can resume normal activities within 24–48 hours after a small shave or punch biopsy.
- For larger excisional or incisional biopsies, recovery may take longer depending on wound size and location.
- Strenuous activity, heavy lifting, swimming, or exposing the biopsy site to sun should be avoided until fully healed.
Tip: Always check with your dermatologist about activity restrictions specific to your procedure.
Conclusion
A skin biopsy procedure is a vital tool for diagnosing and managing skin conditions, including life-threatening cancers. In the USA 2026, the procedure is safe, efficient, and widely accessible. Understanding the types, preparation, costs, insurance coverage, and aftercare helps patients make informed decisions. Always consult a certified dermatologist for guidance tailored to your condition.
Desclamier
This article’s description of skin biopsy techniques is meant solely for general educational purposes. It is not a replacement for expert medical guidance, diagnosis, or care. If you have any queries about a skin problem, biopsy, or other medical issues, you should always consult a skilled dermatologist or healthcare professional. Based on the information in this article, do not ignore or put off getting expert medical advice. Procedures, expenses, recuperation periods, and outcomes can change based on a patient’s unique situation, location, and healthcare providers.