Microneedling at Home: Tips, Kits & Results
Microneedling at Home (2025): Complete Guide, Kits & Before-After Results
Introduction
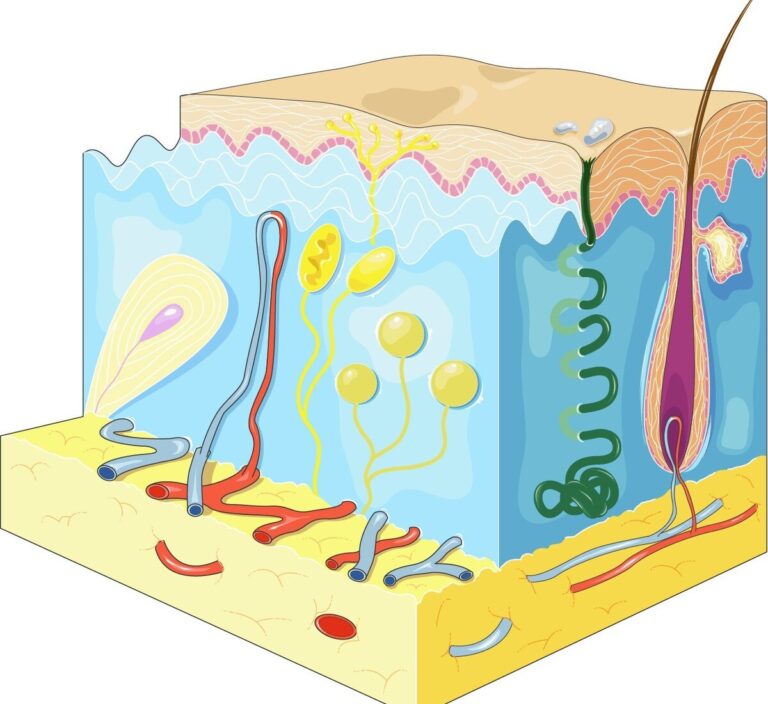
Microneedling at home has become a popular skincare trend in 2025, helping people reduce fine lines, acne scars, and improve overall skin texture without visiting a clinic. Using tiny needles, this procedure stimulates collagen production, enhances skin absorption of serums, and promotes a youthful glow.
While professional microneedling is highly effective, doing it at home is convenient, cost-effective, and surprisingly safe—if done correctly. In this guide, we’ll cover how to do microneedling at home, the best kits available, before and after results, and essential safety tips.
Benefits of Microneedling at Home
Microneedling at home has become one of the most sought-after skincare treatments in 2025, offering a range of benefits for healthier, smoother, and more youthful-looking skin. Unlike professional microneedling sessions that require appointments and higher costs, home microneedling provides convenience while still delivering remarkable results—provided it is done safely and consistently. Below, we explore the key benefits in detail:For deeper or stubborn pigmentation, laser treatment for dark spots might be more effective.
1. Improves Skin Texture
One of the most immediate and noticeable benefits of microneedling at home is the improvement in skin texture. Tiny needles create micro-channels in the skin, stimulating the skin’s natural healing response. This process helps smooth out rough patches, reduces unevenness, and softens fine lines. Regular home microneedling sessions can transform dull, bumpy skin into a smooth and radiant complexion, giving you a polished and youthful look without leaving your home.
2. Reduces Acne Scars
Acne scars can be stubborn and difficult to treat with standard topical products alone. Microneedling at home works by breaking down scar tissue and stimulating collagen and elastin production in the affected areas. Over time, this helps fade pitted scars, shallow marks, and other types of acne-related damage. With consistent use of a home microneedling kit, many users notice a visible reduction in acne scars within a few weeks, making it an effective, budget-friendly alternative to clinical treatments.
Advertisement
3. Boosts Collagen Production
Collagen is the structural protein that keeps skin firm, plump, and youthful. As we age, collagen production naturally declines, leading to sagging, wrinkles, and fine lines. Microneedling at home triggers the skin’s natural repair mechanisms, stimulating new collagen and elastin production. This not only improves elasticity but also helps restore the skin’s natural resilience, resulting in a firmer and more lifted appearance over time. Regular home treatments can serve as a preventive measure, slowing down early signs of aging.
4. Enhances Serum Absorption
Another major advantage of microneedling at home is that it significantly improves the absorption of serums and skincare products. The micro-channels created during the treatment allow active ingredients like hyaluronic acid, vitamin C, and peptides to penetrate deeper into the skin. This means that the serums and moisturizers applied after treatment work more effectively, maximizing hydration, nourishment, and overall skin health. This benefit makes home microneedling an ideal companion to your existing skincare routine.
5. Minimizes Pores
Enlarged pores can be a common concern, especially for oily and combination skin types. Microneedling at home helps tighten the skin and reduce the appearance of pores by stimulating natural collagen production around pore walls. As a result, pores appear smaller, giving the skin a smoother, refined texture. Over time, consistent home microneedling can significantly improve the overall tone and clarity of your complexion, making your skin look fresh and rejuvenated.
💡 Pro Tip: For best results, always pair microneedling at home with gentle serums and moisturizers, avoid overdoing the procedure, and follow proper hygiene practices to prevent irritation or infection.
Can You Do Microneedling at Home?
If you’ve ever wondered, “Can you do microneedling at home?” or “Can I do microneedling at home?”, the short answer is yes, but it comes with important precautions. Microneedling at home has gained popularity in 2025 because it allows skincare enthusiasts to achieve smoother, firmer, and healthier-looking skin without visiting a professional clinic.
Recommended for You
Home microneedling devices are specifically designed for safe, non-professional use. They can deliver noticeable results when used correctly. However, improper technique, lack of hygiene, or overuse can lead to unwanted side effects, such as:
- Skin irritation and redness – Applying too much pressure or using the wrong needle length can cause inflammation.
- Infections – Using an unclean device or skipping sterilization may introduce bacteria into the skin.
- Scarring or hyperpigmentation – Excessive treatments or aggressive rolling can damage the skin and lead to long-term marks.
Tips for Safe Microneedling at Home
To safely enjoy the benefits of microneedling at home, follow these expert tips:
- Choose a Certified Device – Invest in a trusted microneedling pen or roller from reputable brands. Devices like Pen microneedling at home are designed with adjustable needle lengths and safety features.
- Disinfect Before Every Use – Always clean your device with 70% alcohol before and after treatment to prevent infections.
- Follow Instructions Carefully – Avoid guessing needle depth, pressure, or frequency. Each device comes with guidelines—stick to them.
- Start Slowly – For beginners, start with shorter needle lengths (0.25–0.5mm) and increase only if your skin tolerates it.
- Avoid Active Skin Conditions – Skip microneedling on areas with acne flare-ups, eczema, open wounds, or irritation.
- Post-Treatment Care – Post-microneedling care is crucial. Using soothing products from ZO Skin Health range can help calm the skin and reduce irritation. Apply gentle serums like hyaluronic acid, moisturizers, and always use sunscreen to protect sensitive, freshly treated skin.
By taking these precautions, microneedling at home can be a safe, effective, and convenient way to improve skin texture, reduce scars, and boost overall skin health.
💡 Pro Tip: Document your progress with photos to track improvements over time. Many users notice subtle changes within a few weeks and significant benefits after consistent use.
How to Do Microneedling at Home (Step-by-Step Guide)
Performing microneedling at home can be safe and effective if done correctly. This step-by-step guide ensures you get maximum benefits while minimizing risks like irritation or infection.
1. Cleanse Your Skin Thoroughly
Before starting microneedling at home, it’s essential to clean your skin completely. Remove all makeup, dirt, and excess oil using a gentle, non-irritating cleanser. Proper cleansing prevents bacteria from entering the tiny micro-channels created during the procedure, reducing the risk of infections.
💡 Tip: Pat your skin dry with a clean towel—never rub harshly before microneedling.
2. Disinfect Your Device
Next, disinfect your microneedling pen or roller with 70% alcohol. This step is crucial for safe microneedling at home, as even a tiny amount of bacteria can cause breakouts or irritation. Allow the device to air-dry before use to ensure complete sterilization.
3. Choose Needle Length Wisely
Selecting the correct needle length is one of the most important factors for safe microneedling at home:
- 25mm: Ideal for beginners; enhances serum absorption and improves skin texture.
- 5mm: Suitable for treating light acne scars and fine lines.
- 0mm or longer: Only for experienced users; can treat deeper scars or stretch marks but increases the risk of irritation.
💡 Tip: Never use needles longer than 1.5mm at home—professional supervision is required for deeper treatments.
4. Perform the Procedure Carefully
When performing microneedling at home, move the device gently across your skin:
- Roll or glide in vertical, horizontal, and diagonal directions to ensure even coverage.
- Apply light, consistent pressure—pressing too hard can damage the skin.
- Avoid sensitive areas like eyelids or broken skin.
This technique creates micro-channels in the skin, stimulating collagen production and enhancing serum absorption.
5. Apply Serum or Moisturizer
Immediately after treatment, apply a gentle serum or moisturizer. Microneedling at home opens the skin to better absorb active ingredients, making products like hyaluronic acid, vitamin C, or peptide serums highly effective.To maximize microneedling results, pairing with potent serums from Environ skincare products can boost skin rejuvenation.
💡 Pro Tip: Avoid products with alcohol, retinol, or harsh acids right after microneedling, as they can irritate freshly treated skin.
6. Clean the Device Again
After finishing, disinfect your microneedling device again with 70% alcohol and store it safely. Proper cleaning ensures that your next microneedling at home session is safe and hygienic.
7. Aftercare for Optimal Results
Post-treatment care is vital for safe and effective microneedling at home:
Avoid sun exposure for 24–48 hours; skin is more sensitive to UV damage.
Skip makeup for the rest of the day to prevent irritation or clogged pores.
Use a gentle moisturizer to hydrate and calm the skin. After a microneedling session, hydrating masks like those listed in best face masks in 2025
can help restore moisture and enhance results.
To promote internal skin healing, drink lots of water.
Best Microneedling at Home Kits (2025)
Choosing the best microneedling at home kit is crucial to ensure safety, effectiveness, and noticeable results. With so many devices available in 2025, it’s important to select a kit that fits your skin type, experience level, and specific skincare goals. Below are some of the top-rated options for microneedling at home:
1. Dr. Pen Microneedling at Home
The Dr. Pen microneedling at home device is one of the most popular choices for beginners and experienced users alike.
Key Features:
- Adjustable needle length for different skin concerns
- Safe for reducing acne scars, fine lines, and wrinkles
- Lightweight, ergonomic, and easy to use at home
Benefits:
- Delivers professional-quality results without a clinic visit
- Compatible with serums and skin-nourishing products
- Durable and long-lasting for repeated home treatments
💡 Tip: Pair Dr. Pen with a gentle hyaluronic acid serum after each session to maximize hydration and collagen stimulation.
2. RF Microneedling at Home
RF (Radiofrequency) microneedling devices combine traditional microneedling with radiofrequency energy to deliver deeper skin rejuvenation.
Key Features:
- Stimulates deeper collagen production for firmer skin
- Enhances skin tightening and elasticity
- Suitable for fine lines, mild wrinkles, and sagging skin
Benefits:
- Offers more intensive results compared to standard microneedling at home
- Can improve overall skin tone and texture
- Great for users seeking advanced home treatments
💡 Tip: Start with the lowest RF setting and gradually increase as your skin adapts to avoid irritation.
3. Complete Microneedling Kits
For beginners, complete kits are ideal for safe and effective microneedling at home. These kits typically include everything you need for your first session.
Key Features:
- Includes a roller or pen, disinfectant, and serum
- Often comes with step-by-step instructions
- Designed for beginner-friendly, at-home use
Benefits:
- Ensures you have all essential tools for proper hygiene and treatment
- Reduces the risk of mistakes compared to using separate components
- Affordable and convenient for consistent use at home
💡 Tip: Always read the instruction manual thoroughly before starting your first session to ensure correct needle length and technique.
Choosing the Right Kit for You
When selecting the best microneedling at home kit, consider:
- Your skin concern: Acne scars, wrinkles, enlarged pores, or general skin rejuvenation
- Experience level: Beginners should start with complete kits or devices with adjustable needle lengths
- Budget: Kits vary in price; choose one that balances quality, safety, and affordability
- Device type: Pen for traditional microneedling, RF devices for deeper collagen stimulation
By choosing the right kit, you can safely perform microneedling at home, achieve noticeable skin improvements, and save money compared to professional treatments.
Microneedling at Home: Before and After Results
One of the most common questions people ask when starting microneedling at home is: “When will I see results?” While results vary depending on skin type, needle length, and consistency, following a proper routine can lead to visible improvements over time. Here’s a realistic timeline of what to expect:
After 2–4 Weeks
- Skin Texture: Early improvements in skin smoothness and softness become noticeable.
- Minor Scars: Light acne scars or shallow marks may start to fade gradually.
- Glow and Radiance: Increased blood circulation from microneedling at home promotes a healthy, natural glow.
💡 Tip: At this stage, continue applying gentle serums and moisturizers after each session to maximize benefits.
After 6–8 Weeks
- Reduction in Fine Lines: Regular microneedling at home stimulates collagen production, helping reduce fine lines and mild wrinkles.
- Smoother Skin: Skin texture becomes more even and refined, with smaller pores and improved elasticity.
- Improved Serum Absorption: Your skin absorbs skincare products better, enhancing hydration and nourishment.
💡 Tip: Maintain proper spacing between sessions depending on needle length (0.25–0.5mm weekly; 1.0mm every 3–4 weeks) to avoid over-treatment.
After 12 Weeks
- Significant Improvement in Acne Scars: Deepening scars and pigmentation begin to fade noticeably.
- Even Skin Tone: Consistent microneedling at home sessions help reduce discoloration, leaving skin tone more uniform.
- Firmness and Elasticity: Collagen remodeling results in firmer, plumper, and healthier-looking skin.
💡 Tip: Take clear before and after photos at each stage to track your progress. This helps measure improvement objectively and keeps you motivated.
Additional Insights for Best Results
- Consistency is Key: Results are cumulative; skipping sessions can delay progress.
- Combine with Serums: Use hydrating and collagen-boosting serums for faster, more visible effects.
- Avoid Sun Exposure: Protecting your skin post-treatment enhances healing and prevents pigmentation.
- Patience Matters: While minor improvements appear in a few weeks, full benefits typically require 2–3 months of consistent treatment.
By following the proper microneedling at home routine and maintaining patience, most users can enjoy smoother skin, reduced scars, and a radiant complexion—all from the comfort of their home.
Recommended Frequency by Needle Length
- 25mm Needle – 1–2 Times Per Week
- Ideal for beginners and those focused on improving serum absorption and overall skin texture.
- Light enough to allow your skin to recover quickly, while still stimulating collagen production.
- Perfect for maintaining healthy, glowing skin without the risk of over-treatment.
- 5mm Needle – Every 2–4 Weeks
- Suitable for targeting fine lines, shallow acne scars, and minor pigmentation.
- This needle length penetrates deeper into the skin, so your skin needs extra recovery time.
- Performing microneedling at home every 2–4 weeks gives collagen time to remodel, maximizing results.
- 0mm Needle or Higher – Once a Month (Experienced Users Only)
- Designed for deeper scars, stretch marks, and more intensive skin rejuvenation.
- Only recommended for users with prior microneedling experience to avoid injury.
- Spacing sessions one month apart ensures proper healing and collagen regeneration.
Why Frequency Matters
- Skin Recovery: Microneedling creates tiny micro-injuries that require time to heal. Too frequent sessions can damage the skin barrier.
- Collagen Remodeling: Collagen stimulation is a gradual process; spacing sessions allows the skin to naturally repair and strengthen.
- Avoid Irritation and Infection: Excessive microneedling increases the risk of redness, inflammation, and bacterial infections.
💡 Pro Tip: Track your sessions in a skincare journal or calendar. This helps you follow a consistent schedule, prevents overuse, and ensures safe microneedling at home practice.
Additional Safety Tips
- Always adjust your needle length according to your experience and skin tolerance.
- Avoid microneedling on active acne, open wounds, or inflamed skin.
- Pair treatments with gentle serums and moisturizers to support healing.
- Apply sunscreen daily, especially after microneedling, to protect newly sensitive skin.
By following the correct frequency and safety precautions, microneedling at home can deliver impressive results, including smoother texture, smaller pores, reduced scars, and a more youthful complexion—without leaving your home.
Tips & Safety Precautions for Microneedling at Home
While microneedling at home is safe and effective when done correctly, following proper tips and safety precautions is essential to avoid irritation, infection, or long-term skin damage. Here’s a detailed guide to ensure safe and successful treatments:
1. Disinfect Everything
Before and after each session, disinfect your microneedling device with 70% alcohol. This step is critical to prevent bacteria from entering the micro-channels created during treatment, which can lead to infections or breakouts.
💡 Pro Tip: Also clean your hands, work surface, and any tools or serums used during the procedure for maximum hygiene.
2. Avoid Active Acne, Infections, or Inflamed Skin
Do not perform microneedling at home on areas with active acne, eczema, wounds, or other skin infections. Microneedling inflamed skin can worsen irritation, spread bacteria, and cause scarring. Always wait until your skin has fully healed before starting your next session.
3. Use Sunscreen Daily
After microneedling, your skin becomes more sensitive to UV rays. Apply broad-spectrum sunscreen every day, even indoors, to protect your skin from sun damage, hyperpigmentation, and irritation. This is especially important for microneedling at home users aiming to improve skin tone and reduce scars.
💡 Pro Tip: Avoid direct sun exposure for at least 24–48 hours after treatment for optimal results.
4. Don’t Share Devices
Sharing your microneedling pen or roller increases the risk of cross-contamination and infection. Microneedling at home devices should be personal and kept clean between sessions. Proper storage in a safe, dry place ensures your device remains sterile and effective.
5. Be Gentle and Avoid Harsh Rolling
Applying excessive pressure or rolling aggressively can damage the skin, cause bruising, and delay healing. Microneedling at home should be done with light, controlled movements in vertical, horizontal, and diagonal directions. Let the device do the work—gentle, consistent strokes are more effective than forceful rolling.
6. Additional Safety Tips
- Start with shorter needle lengths (0.25–0.5mm) if you’re a beginner.
- Limit microneedling sessions according to recommended frequency for your needle length.
- Pair treatments with soothing serums like hyaluronic acid or peptides to support skin recovery.
- Avoid harsh chemical exfoliants or retinol immediately after treatment to prevent irritation.
By following these tips and safety precautions, microneedling at home can be a highly effective way to improve skin texture, minimize scars, and enhance overall skin health—all safely from the comfort of your home.
Conclusion
Microneedling at home is a safe, effective, and budget-friendly way to improve your skin, reduce acne scars, and stimulate collagen. By choosing the right kit, following proper technique, and taking necessary precautions, you can achieve salon-quality results from the comfort of your home.
Ready to try? Start with a certified kit like Dr. Pen or an RF microneedling device, follow our step-by-step guide, and enjoy glowing, youthful skin in 2025!
FAQ
1. What is microneedling at home?
Microneedling at home is a cosmetic skincare procedure where tiny needles create micro-channels in the skin to stimulate collagen production, improve skin texture, reduce acne scars, and enhance the absorption of serums—all done safely from home with a microneedling device.
2. Can I do microneedling at home safely?
Yes, microneedling at home is safe if you follow proper hygiene, use a certified device, and follow the recommended frequency for your needle length. Avoid using the device on inflamed skin, open wounds, or active acne.
3. How often should I do microneedling at home?
Frequency depends on needle length:
- 25mm: 1–2 times per week
- 5mm: Every 2–4 weeks
- 0mm or higher: Once a month (for experienced users only)
Overdoing it can cause irritation or damage, so follow the recommended schedule carefully.
4. What are the benefits of microneedling at home?
Microneedling at home offers multiple benefits:
- Improves skin texture and smoothness
- Reduces acne scars and fine lines
- Boosts collagen production for firmer skin
- Enhances serum absorption
- Minimizes pore size for a refined complexion
5. What products should I use after microneedling at home?
After treatment, apply gentle, hydrating serums or moisturizers like hyaluronic acid, vitamin C, or peptides. Avoid harsh chemicals, retinol, or strong acids for 24–48 hours. Always use sunscreen during the day to protect sensitive skin.
6. When will I see results from microneedling at home?
- 2–4 weeks: Improved skin texture, minor scars start fading
- 6–8 weeks: Reduced fine lines and smoother skin
- 12 weeks: Noticeable improvement in acne scars, skin tone, and firmness
Consistency is key for best results.
7. Which devices are best for microneedling at home?
Top devices for microneedling at home include:
- Pen microneedling at home – Adjustable, beginner-friendly
- RF microneedling devices – Stimulates deeper collagen for advanced results
- Complete kits – Includes roller/pen, disinfectant, and serum, ideal for beginners
Disclaimer:
This article’s product reviews, routines, and skincare advice are provided solely for informational purposes. Each person’s skin type—oily, dry, or sensitive—reacts differently to substances like vitamin C, retinol, and homemade masks. Before attempting any new product or solution, we highly advise conducting a patch test. Please see a licensed dermatologist if you have ongoing skin issues or before beginning clinical therapies. Individual outcomes might differ.
You Might Also Like